


{
“@type”: “Article”,
“author”: {
“url”: “https://coffee-sensor.com”,
“name”: “CoffeeSensor”,
“@type”: “Organization”
},
“@context”: “https://schema.org”,
“headline”: “Espresso Machine Troubleshooting Guide for Peak Performance”,
“publisher”: {
“url”: “https://coffee-sensor.com”,
“name”: “CoffeeSensor”,
“@type”: “Organization”
},
“inLanguage”: “en”,
“description”: “Follow this espresso machine troubleshooting guide to diagnose, fix, and optimize your coffee equipment through step-by-step solutions for consistent results.”,
“datePublished”: “2025-10-24T11:30:05.179Z”
}
Did you know that espresso machines can lose up to 30 percent of their efficiency if not regularly maintained? For coffee lovers, a neglected machine means inconsistent shots and potential safety risks. By following a structured inspection process, you can spot hidden problems early and keep your espresso tasting its best every time.
Table of Contents
- Step 1: Prepare Your Espresso Machine for Inspection
- Step 2: Identify Common Performance Issues
- Step 3: Check Critical Components for Faults
- Step 4: Replace or Adjust Parts as Needed
- Step 5: Test Machine Functions for Consistency
Quick Summary
| Key Point | Explanation |
|---|---|
| 1. Turn Off and Cool Machine First | Always unplug and let your espresso machine cool completely to prevent burns during inspection. |
| 2. Document Configuration with Photos | Take photos of your machine before disassembly to aid in proper reassembly later on. |
| 3. Check for Common Wear and Damage | Inspect critical components for scaling, rust, or worn seals to identify potential brewing issues early. |
| 4. Replace Worn Parts Promptly | Install new gaskets or baskets when signs of wear are detected to maintain machine performance. |
| 5. Conduct Functional Tests Post-Maintenance | Run water flush cycles and test pressure stability to ensure your machine functions optimally before brewing. |
Step 1: Prepare Your Espresso Machine for Inspection
Before diving into a comprehensive inspection of your espresso machine, proper preparation is key to ensuring an accurate and safe assessment. Turning off and cooling down your machine completely sets the foundation for a thorough evaluation. According to coffee equipment research, this initial step prevents potential burns and allows for a systematic approach to machine maintenance.
Start by unplugging your espresso machine from the electrical outlet. Wait approximately 15 to 20 minutes to ensure all internal components have cooled down completely. This cooling period allows metal parts to return to ambient temperature and reduces any risk of accidental scalding during the inspection process.
Next, remove all detachable components carefully. This includes the portafilter, drip tray, water reservoir, and any external screens or filters. Removing these parts not only prevents contamination but also provides clear access to examine each section of your machine thoroughly. Arrange these components on a clean towel or workspace where they can be easily inspected and cleaned separately.
Pro Tip: Always photograph your machine’s current configuration before disassembly. This visual reference helps during reassembly and can help you track any changes or potential wear patterns over time.
Careful preparation transforms your espresso machine inspection from a potentially overwhelming task into a structured and manageable process. By taking these methodical steps, you set the stage for identifying potential issues early and maintaining your machine’s optimal performance.
Ready to move forward? The next step involves a detailed visual and tactile examination of your machine’s critical components.
Step 2: Identify Common Performance Issues
Now that your espresso machine is prepared for inspection, it is time to systematically identify potential performance problems that can impact your brewing quality. Understanding these issues early can save you from costly repairs and ensure consistently delicious espresso shots.
Start by visually examining the machine’s key components. Look for signs of wear, corrosion, or mineral buildup on critical parts like the group head, portafilter, and water lines. Discoloration, scaling, or visible residue can indicate potential performance limitations. Pay special attention to the rubber seals and gaskets, as these are often the first components to show signs of degradation.
Check the machine’s water pressure and temperature stability. Inconsistent pressure can result in uneven extraction, leading to espresso shots that taste weak or overly bitter. Listen for unusual sounds during the brewing process such as grinding, sputtering, or inconsistent pump noises. These can signal internal mechanical issues that might require professional attention.
Warning: Irregular water flow or inconsistent steam pressure are red flags that should not be ignored. These symptoms often indicate deeper mechanical problems that can worsen if left unaddressed.
Examine the electrical connections and power cord for any signs of fraying, wear, or damage. Loose connections or compromised electrical components can not only affect machine performance but also pose potential safety risks. Gently wiggle connections and inspect the cord for any visible damage or stress points.
By conducting this thorough visual and functional assessment, you are taking proactive steps to maintain your espresso machine’s peak performance.
The next stage involves a more detailed diagnostic process to pinpoint and address specific mechanical concerns.
Here’s a summary of common espresso machine issues and their potential causes:
| Component | Issue Detected | Possible Cause |
|---|---|---|
| Group Head | Scaling Water leaks |
Mineral buildup Worn gasket |
| Portafilter/Basket | Uneven extraction Rust |
Warped basket Aged metal |
| Steam Wand | Blockage Weak steam |
Milk residue Mineral deposits |
| Water Lines | Low flow Leaks |
Clogs Corrosion |
| Electrical Elements | Power issues Unusual noise |
Worn cord Loose connections |
Step 3: Check Critical Components for Faults
With your espresso machine carefully prepared and initial performance issues identified, it is now time to conduct a detailed examination of its most critical components. This methodical approach will help you diagnose potential problems that could compromise your machine’s functionality and espresso quality.
Begin by thoroughly inspecting the group head, which is the heart of your espresso machine. Look for signs of mineral buildup, cracks, or uneven surfaces that might disrupt water flow. Check the group head gasket for wear, as a damaged or compressed gasket can lead to inconsistent pressure and poor extraction.
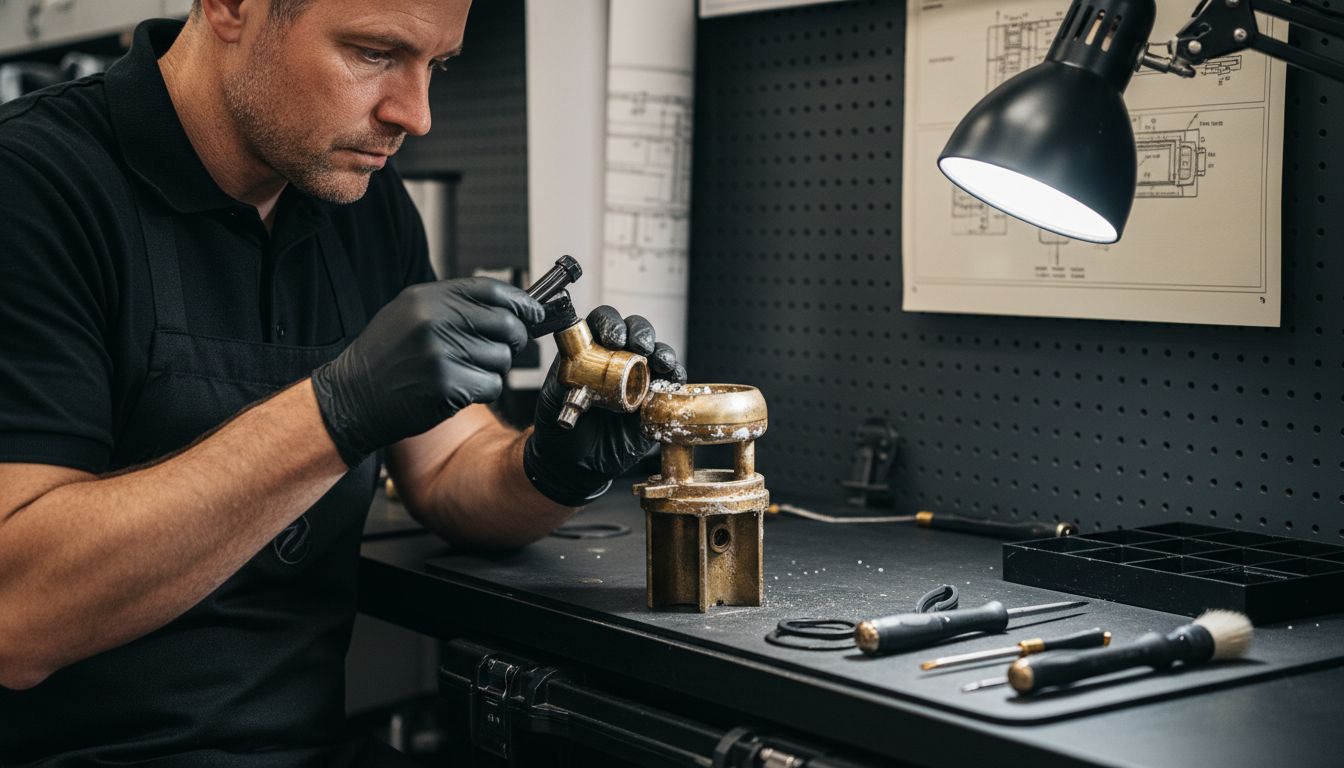 Gently press around the gasket to test its flexibility and integrity.
Next, focus on the portafilter and its basket. Examine the basket for any warping, rust, or holes that could affect water distribution. The portafilter itself should have a smooth, clean surface without significant scratches or deformations. Test the fit of the portafilter in the group head to ensure a tight, secure seal that prevents water leakage during brewing.
Pro Tip: Use a bright light and magnifying glass to inspect small components. This can help you spot minute imperfections that might be difficult to see with the naked eye.
Inspect the steam wand carefully. Check the tip for blockages or mineral deposits that could obstruct steam flow. Move the wand joints to ensure smooth movement and look for any signs of leaking or stiffness. Clean the steam wand tip with a specialized cleaning pin to remove any milk residue or buildup that could affect steam quality.
Finally, examine the machine’s internal water lines and connections. Look for signs of corrosion, leaks, or mineral scaling. These issues can significantly impact water quality and machine performance. If you notice extensive buildup or damage, it might be time to consider professional servicing or replacement of specific components.
By systematically checking these critical components, you are taking proactive steps to maintain your espresso machine’s optimal performance and extend its operational life. Learn more about espresso machine parts in our comprehensive guide to deepen your understanding of these crucial elements.
Ready to move to the next stage? Prepare for a detailed cleaning and maintenance process that will restore your machine’s peak functionality.
Step 4: Replace or Adjust Parts as Needed
After thoroughly examining your espresso machine, you may have identified components that require replacement or adjustment. This critical stage of machine maintenance ensures optimal performance and prevents potential brewing issues that could compromise your espresso quality.
Start with the group head gasket, which is often the most frequent replacement component. If you noticed signs of wear such as compression, cracking, or uneven surface, it is time to install a new gasket. Carefully remove the old gasket by gently prying it out with a non metallic tool. Clean the group head surface thoroughly before installing the new gasket to ensure a perfect seal and prevent potential leaks.
For the portafilter basket, replacement becomes necessary when you observe significant wear such as warping, rust, or visible holes. Choose a replacement basket that matches your machine specifications exactly. When installing, ensure the basket sits flush and creates a tight seal within the portafilter frame. A precise fit is crucial for consistent water distribution during extraction.
Pro Tip: Always keep spare parts on hand. Having replacement gaskets, screens, and baskets readily available can save you time and prevent extended machine downtime.
Inspect the steam wand tip and consider replacement if you notice persistent blockages or damage that cleaning cannot resolve. Some steam wand tips can be unscrewed and replaced relatively easily. When installing a new tip, ensure it is compatible with your specific machine model and tightened securely to prevent steam leakage.
For more complex adjustments like calibrating water pressure or temperature, consider seeking professional assistance.
VIDEO:video_content] These precise mechanical adjustments often require specialized tools and expertise. [Our comprehensive guide to espresso machine parts can provide additional insights into when and how to approach these more technical modifications.
By methodically replacing and adjusting components, you are taking proactive steps to maintain your espresso machine’s performance and extend its operational life. The next stage will focus on reassembling and testing your machine to ensure everything functions perfectly.
Step 5: Test Machine Functions for Consistency
With your espresso machine carefully prepared and components replaced or adjusted, the final critical step is conducting comprehensive functional tests to ensure optimal performance. These systematic tests will help you validate the effectiveness of your maintenance work and confirm your machine is operating at peak efficiency.
Begin by running a series of water flush cycles without coffee. This process helps clear any residual cleaning agents and allows you to observe water flow consistency. Watch carefully for even water distribution from the group head and listen for any unusual pump sounds. Smooth water flow indicates that your group head gasket and internal water lines are functioning correctly.
Next, perform temperature stability tests by running multiple blank shots and measuring the water temperature at the group head. Consistent temperature is crucial for extracting balanced espresso. Use a digital thermometer if possible to track temperature variations. Ideally, your machine should maintain a steady temperature within a 1 to 2 degree range across multiple extraction cycles.
Warning: Significant temperature fluctuations could indicate underlying heating element or thermostat problems that might require professional servicing.
Test the steam wand functionality by steaming a small amount of milk. Evaluate the steam pressure consistency, looking for smooth and steady steam flow without sputtering or intermittent bursts. Check that the steam wand moves smoothly and creates proper microfoam texture. Uneven steam performance might suggest issues with internal pressure mechanisms.
Finally, pull several test espresso shots using your standard coffee blend. Analyze the extraction quality by observing crema color, consistency, and shot volume. Consistent shots with rich golden brown crema indicate that your machine components are working harmoniously. Explore our guide on brewing the perfect espresso to understand the nuanced details of ideal extraction.
These comprehensive tests provide a holistic assessment of your espresso machine’s performance. Any persistent irregularities might indicate the need for professional diagnostic evaluation or more extensive repairs.
Keep Your Espresso Machine in Peak Condition With Expert Parts and Support
If you have faced challenges like worn gaskets, uneven water flow, or stubborn mineral buildup during your espresso machine troubleshooting you know how frustrating it can be to lose that perfect shot. Key parts like the group head gasket, portafilter basket, and steam wand often wear down but replacing them with high-quality compatible components can restore your machine’s performance and consistency. Don’t let small issues turn into costly repairs or disrupt your daily coffee ritual.

Take control over your espresso experience today by exploring a curated selection of premium espresso machine parts and accessories at coffee-sensor.com. Whether you need durable gaskets, precise temperature sensors, or expert restoration services for brands like La Pavoni or Olympia Cremina you will find solutions tailored to passionate coffee enthusiasts and professionals alike. Act now to prevent further wear and enjoy the rich consistent espresso shots you deserve with trusted components and expert guidance from Espresso Machine Troubleshooting Guide for Peak Performance and our detailed insights on espresso machine parts. Begin your upgrade journey and keep every shot perfect by visiting https://coffee-sensor.com now.
Frequently Asked Questions
How do I prepare my espresso machine for inspection?
To prepare your espresso machine for inspection, start by unplugging it and allowing it to cool down for 15 to 20 minutes. Next, remove all detachable components like the portafilter and water reservoir to ensure a thorough and safe examination.
What common performance issues should I look for in my espresso machine?
When inspecting your espresso machine, look for signs of wear, corrosion, or mineral buildup, particularly on the group head and portafilter. Watch for inconsistent water pressure or unusual sounds during brewing, as these can indicate deeper mechanical problems that need attention.
How do I check for faults in the group head?
Inspect the group head for mineral buildup, cracks, or worn gaskets, as these can disrupt water flow. If you notice any damage, replace the group head gasket to ensure a proper seal and optimal brewing pressure.
When should I replace the steam wand tip?
Replace the steam wand tip if you experience blockages or significant damage that cleaning cannot resolve. Ensuring a clear and functional steam wand tip helps maintain consistent steam pressure and quality for frothing milk.
How can I test the consistency of my espresso machine’s performance?
To test your machine’s consistency, run multiple flush cycles and measure the water temperature at the group head. This should remain stable within a 1 to 2 degree range; if variations occur, consider professional servicing.
What steps should I follow if I identify an issue during inspection?
If you identify an issue, such as a worn gasket or inconsistent pressure, promptly replace or adjust the affected component. This proactive approach will help maintain your machine’s peak performance and prevent more significant repairs in the future.


